


Planning the Quilotoa Loop can feel confusing at the start. The route has small villages, changing bus times, high altitude, and long hiking days. You may also wonder if you need a guide, where to sleep, how much cash to carry, and which direction is best.
This Quilotoa Loop guide keeps things simple. You’ll get the best route, a clear 3-day itinerary, transport tips, budget costs, packing advice, safety notes, and the mistakes to avoid before hiking in Ecuador’s Andes.
Quilotoa Loop at a glance
| Item | Quick answer |
|---|---|
| Country | Ecuador |
| Main base city | Latacunga |
| Classic route | Sigchos to Isinliví to Chugchilán to Quilotoa |
| Best length | 3 days |
| Short option | 2 days from Isinliví to Quilotoa |
| Full distance | About 40 km / 25 miles |
| Difficulty | Moderate to hard |
| Highest point | Quilotoa area, around 3,914 m |
| Best months | June to September |
| Typical budget | $90–$150 for 3 days |
| Guide needed? | Optional, but useful if you are nervous with trail finding |
The classic Quilotoa Loop connects Sigchos, Isinliví, Chugchilán, and Quilotoa through highland trails, small villages, valleys, and dirt roads. The full route is about 40 km and usually takes 3 to 5 days, depending on your pace and starting point.
What is the Quilotoa Loop?
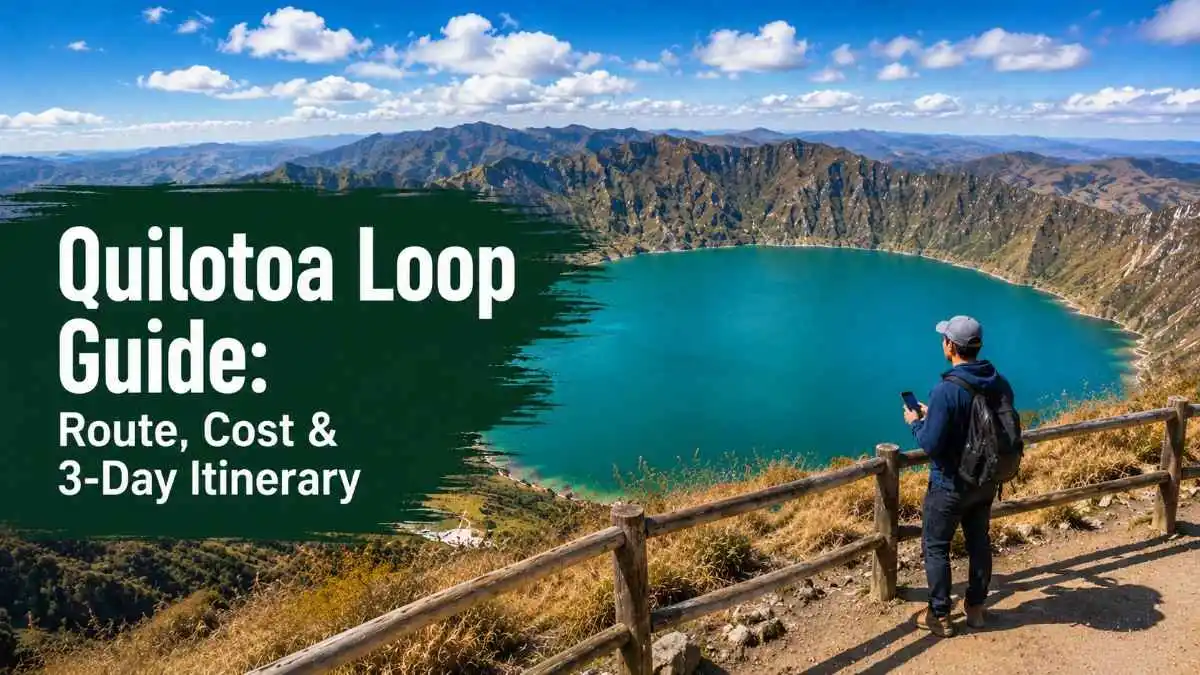
The Quilotoa Loop is a multi-day hiking route in Ecuador’s Cotopaxi province. It ends or starts near Laguna Quilotoa, a turquoise crater lake inside a volcanic caldera.
Quilotoa volcano has an elevation of 3,914 m / 12,841 ft, and its last known eruption was 1280 CE.
Most travelers hike from village to village instead of camping. This makes the route easier to plan because you can sleep in guesthouses, eat dinner there, and buy packed lunch for the next hiking day.
Is the Quilotoa Loop worth it?
The Quilotoa Loop is worth it if you want a budget-friendly Andes hike with real village stops, wide mountain views, and a strong finish at Laguna Quilotoa.
It is a good choice for travelers who want something more independent than a day tour from Quito. You get quiet trails, local guesthouses, farm paths, canyon views, and a crater lake at the end.
The hike is tiring because of altitude, sun, wind, loose dirt, and steep climbs. It is still one of the best budget treks in Ecuador because you do not need expensive permits or camping gear. Travelers who enjoy green valleys and rural trails may also like this Cocora Valley Colombia Guide for another scenic hike in South America.
Best Quilotoa Loop route
The best route for most travelers is:
Latacunga → Sigchos → Isinliví → Chugchilán → Quilotoa → Latacunga
This route saves Quilotoa Lake for the final day. It also gives you a clear 3-day plan:
| Day | Route | Distance | Walking time |
|---|---|---|---|
| Day 1 | Sigchos to Isinliví | 14 km / 8.7 miles | 4–7 hours |
| Day 2 | Isinliví to Chugchilán | 12 km / 7.5 miles | 4–8 hours |
| Day 3 | Chugchilán to Quilotoa | 14 km / 8.7 miles | 5–9 hours |
Should you hike Sigchos to Quilotoa or Quilotoa to Sigchos?
For a first-time hiker, I would choose Sigchos to Quilotoa.
This route builds up to the crater lake. It feels more rewarding because Laguna Quilotoa comes at the end of the trek. You also get the hardest and highest section on the final day, when your body has had more time to adjust.
The reverse route from Quilotoa to Sigchos is easier in some ways because you lose altitude after starting near the lake.
Choose the reverse route if you are short on time, worried about altitude, or want the easier walking direction.
How many days do you need for the Quilotoa Loop?
Most travelers need 3 days for the Quilotoa Loop.
A 3-day route gives you enough time to hike the main trail without rushing every morning. You sleep in Isinliví on night 1 and Chugchilán on night 2, then finish at Quilotoa on day 3.
A 2-day route works if you start in Isinliví and skip the Sigchos to Isinliví section. This is a good plan if you have limited time or want less distance.
A 4-day route is better if you want slower mornings, short side walks, or extra time at the lake.
Best base before the hike

Latacunga is the best base before hiking the Quilotoa Loop.
It has bus links, cheap hostels, luggage storage, ATMs, pharmacies, and food shops. Many travelers stay there the night before the hike, leave their big bag at the hostel, and carry a small backpack on the trail.
This is the easiest setup:
- Arrive in Latacunga.
- Sleep there for 1 night.
- Leave your large bag at your hostel.
- Take an early bus to Sigchos.
- Start hiking to Isinliví.
How to get to the Quilotoa Loop from Quito

From Quito, go to Quitumbe Bus Terminal in the south of the city. From there, take a bus to Latacunga.
Quito to Latacunga buses usually run often, and the trip takes about 1 hour 30 minutes. Tickets are usually around $3 to $4.
Once you reach Latacunga, take a local bus to Sigchos. The Latacunga to Sigchos bus takes about 2 hours, with tickets around $2 to $3. Bus times in Ecuador can change, so check again at the terminal before your hiking day.
How to get back from Quilotoa to Latacunga
After finishing the hike at Quilotoa, take a bus back to Latacunga.
Regular buses usually run from Quilotoa to Latacunga between morning and late afternoon, with the ride taking about 2 hours.
Try to reach Quilotoa before mid-afternoon. This gives you time to see the lake, eat, find the bus, and avoid getting stuck after dark.
Quilotoa Loop 3-day itinerary
Day 1: Latacunga to Sigchos, then hike to Isinliví

Start early from Latacunga. Take the bus to Sigchos, buy water or snacks if needed, then begin the hike to Isinliví.
This day is a good warm-up. The trail passes small farms, dirt paths, open hills, and quiet rural roads. It is still tiring because of the altitude, so start slowly.
Day 1 plan
| Detail | Info |
|---|---|
| Route | Sigchos to Isinliví |
| Distance | About 14 km / 8.7 miles |
| Walking time | 4–7 hours |
| Sleep | Isinliví |
| Main challenge | Finding the right trail turns |
The biggest issue on day 1 is trail direction. Download an offline map before leaving Latacunga. Ask your hostel in Sigchos or Isinliví if they can give current route notes.
Try to reach Isinliví before sunset. The village is small, peaceful, and a good place to rest after your first hiking day.
Day 2: Isinliví to Chugchilán

Day 2 is one of the prettiest parts of the Quilotoa Loop. You pass deep valleys, bridges, farmland, and small settlements.
The trail can be steep in places. There are sections where you go down into valleys and climb back up. This is why the distance looks short, but the day can still take many hours.
Day 2 plan
| Detail | Info |
|---|---|
| Route | Isinliví to Chugchilán |
| Distance | About 12 km / 7.5 miles |
| Walking time | 4–8 hours |
| Sleep | Chugchilán |
| Main challenge | Steep climbs and loose dirt |
Leave after breakfast and carry enough water. Lunch options on the trail are limited, so a packed lunch from your guesthouse is the easiest choice.
Chugchilán has several guesthouses used by hikers. Book ahead in busy months, especially if you want a private room.
Day 3: Chugchilán to Quilotoa

Day 3 is the hardest day for many hikers. It is longer, higher, and more exposed to sun and wind.
The final climb to Quilotoa can feel slow because of altitude. Take breaks, drink water, and keep your pace steady.
Day 3 plan
| Detail | Info |
|---|---|
| Route | Chugchilán to Quilotoa |
| Distance | About 14 km / 8.7 miles |
| Walking time | 5–9 hours |
| Finish | Quilotoa Lake |
| Main challenge | Altitude and final climb |
Once you reach Quilotoa, go to the crater viewpoint. If you still have energy, walk part of the rim or go down toward the lake. The walk down to the water is steep, and the climb back up is much harder because of the altitude.
If you are tired, skip the lake descent and enjoy the view from the rim. You still get the best reward without draining your legs.
Quilotoa Loop cost
The Quilotoa Loop is one of the better budget hikes in South America because transport is cheap and village guesthouses often include meals.
For a 3-day hike, a realistic budget is $90 to $150 per person, depending on your room type, snacks, drinks, transport, and whether you hire a guide.
| Cost item | Budget estimate |
|---|---|
| Quito to Latacunga bus | $3–$4 |
| Latacunga to Sigchos bus | $2–$3 |
| Quilotoa to Latacunga bus | About $2–$4 |
| Guesthouse per night | $20–$35 |
| Packed lunch | $4–$7 |
| Snacks and water | $5–$15 total |
| Local guide, optional | Varies by group size |
| Total for 3 days | Around $90–$150 |
Recent hostel and hotel listings around the route show budget stays can still be found, but prices change by date and room type. Use these numbers as a planning range, then check your exact dates before booking.
Where to stay on the Quilotoa Loop
The classic 3-day route has two main overnight stops:
Night 1: Isinliví
This is a small village with popular hiker lodges and guesthouses. It is a good place to rest after day 1.
Night 2: Chugchilán
This village has several hiker-friendly stays and is the normal stop before the final walk to Quilotoa.
You can also sleep in Quilotoa after finishing the hike if you want more time at the lake or do not want to rush back to Latacunga.
Many guesthouses include dinner and breakfast. Some also sell packed lunches for the next hiking day. This is useful because food stops between villages are limited.
Do you need to book accommodation ahead?
Book ahead if you hike in busy months, travel as a couple, want a private room, or plan to arrive late.
Solo travelers in low season may find rooms on arrival, but it is still safer to book or message the guesthouse before you start. The villages are small. You do not want to finish a long hiking day and then search for a bed in the dark.
For the best plan, book:
- 1 night in Latacunga before the hike
- 1 night in Isinliví
- 1 night in Chugchilán
- Optional 1 night in Quilotoa
Food and water on the trail
Food is simple on the Quilotoa Loop. Most hikers eat breakfast and dinner at their guesthouse, then carry a packed lunch.
Carry snacks from Latacunga because village shops can be small. Good trail snacks include bananas, bread, peanuts, chocolate, cookies, crackers, and electrolyte packets.
For water, carry at least 1.5 to 2 liters each day. More is better on sunny days. Use a filter bottle, purification tablets, or buy bottled water in villages.
Do not count on finding open shops during the hike. Some small stores close early or may have limited stock.
Quilotoa Loop difficulty
The Quilotoa Loop is moderate to hard.
You do not need technical climbing skills, but you do need strong legs, good shoes, and enough fitness for long walking days. The trail has steep climbs, loose dirt, high altitude, strong sun, wind, and some confusing turns.
The hardest parts are usually:
- The climbs out of valleys
- The final day to Quilotoa
- Hiking above 3,000 m
- Loose downhill sections
- Trail finding in fog or poor weather
If you walk often and can hike 5 to 7 hours in a day, you can probably do the route with good planning. If you are new to hiking, start from Isinliví and do the 2-day version. If high-altitude hikes interest you, this Rainbow Mountain Peru Guide is another useful Andes route to compare before planning your trip.
Altitude on the Quilotoa Loop
Altitude is one of the main reasons the Quilotoa Loop feels hard.
Quilotoa volcano is listed at 3,914 m / 12,841 ft. That is high enough to cause headaches, tiredness, shortness of breath, poor sleep, or nausea in some travelers.
Spend at least 1 or 2 nights at altitude before starting if you can. Quito and Latacunga both help your body adjust before the hike.
Go slower than you think you need to. Drink water, eat enough, and avoid alcohol the night before hiking. If symptoms get worse, rest and go lower. For another high-altitude destination in South America, you can also read this Lake Titicaca Travel Guide before building a longer Andes itinerary.
Do you need a guide for the Quilotoa Loop?
You can hike the Quilotoa Loop without a guide if you are comfortable with offline maps, long hiking days, and rural trails.
A guide is a smart choice if you are hiking alone, nervous about getting lost, short on time, or new to multi-day trekking.
A good middle option is to hike without a full-time guide but ask each guesthouse for current trail notes. Some stays give maps, route advice, or GPS tips.
Safety tips for the Quilotoa Loop
The Quilotoa Loop is usually more about hiking safety than city crime. The main risks are altitude, weather, wrong turns, dogs, dehydration, and hiking after dark.
Use these safety rules:
- Start early each day.
- Keep your offline map open.
- Carry cash, water, snacks, and a warm layer.
- Ask locals or guesthouse staff before taking unclear turns.
- Avoid walking after sunset.
- Keep your main bag stored in Latacunga.
- Carry a small first aid kit.
- Tell your guesthouse where you are going.
Ecuador currently has a Level 2 travel advisory due to crime, unrest, terrorism risk, and kidnapping risk in some areas. Demonstrations can block roads without warning, so check transport updates before leaving Quito or Latacunga.
Cotopaxi volcano risk can affect areas around Latacunga, especially low-lying areas in the path of possible mud or lava flow if Cotopaxi erupts. Check local updates before travel if there is volcanic activity.
Best time to hike the Quilotoa Loop
The best time to hike the Quilotoa Loop is usually June to September.
These months are often drier, which makes trail finding easier and gives you a better chance of clear lake views. December to February is also possible but colder and rainier.
Weather can change fast in the Andes. You may get sun, wind, fog, cold air, and rain in the same day.
Bring layers even if the morning looks clear.
What to pack for the Quilotoa Loop

Pack light. A heavy bag makes the climbs much harder.
Leave your large luggage in Latacunga and carry a small hiking backpack.
Packing list
| Item | Why you need it |
|---|---|
| Small backpack | Easier for steep climbs |
| Hiking shoes | Loose dirt and rocky paths |
| Rain jacket | Weather changes fast |
| Warm fleece | Cold evenings and mornings |
| Sun hat | Strong high-altitude sun |
| Sunscreen | UV is strong at altitude |
| Reusable water bottle | Daily hiking water |
| Water filter or tablets | Safer water backup |
| Offline map | Trail finding |
| Portable charger | Phone battery backup |
| Cash | No ATMs on the route |
| Snacks | Limited shops |
| Basic medicine | Headache, stomach, blisters |
| Headlamp | Useful if delayed |
| Dry bag or plastic bag | Keeps clothes dry |
There are no ATMs along the route, so carry enough cash before leaving Latacunga.
How much cash should you carry?
For a 3-day Quilotoa Loop hike, carry at least $120 to $180 cash per person.
This gives you room for accommodation, packed lunches, water, snacks, buses, and small extras. Carry more if you want a private room, a guide, a mule, or a night in Quilotoa after the hike.
Small bills are best. Bring $1, $5, $10, and $20 notes. Small villages may not be able to change large bills.
Can you do the Quilotoa Loop as a solo traveler?
Yes, solo travelers can hike the Quilotoa Loop, but planning matters.
Stay in known guesthouses, start early, use offline maps, and ask staff about the next day’s route. You may meet other hikers at hostels in Latacunga, Isinliví, or Chugchilán.
If you are nervous, start from Isinliví and do the 2-day route. This cuts one hiking day and still gives you the best finish at Quilotoa Lake.
For solo women, the same basic rules apply: avoid hiking late, trust your gut, keep your guesthouse updated, and join other hikers if the route feels too quiet.
Can beginners hike the Quilotoa Loop?
Fit beginners can hike the Quilotoa Loop if they prepare well.
The route is not technical, but the altitude and climbs make it harder than a normal countryside walk. New hikers should use the 2-day route from Isinliví to Quilotoa or hire a guide.
Do a few long walks before your trip. Break in your shoes before Ecuador. Carry less than you think you need. If you want an easier nature trip with beaches and forest trails, this Tayrona National Park Guide may be a better fit before trying a multi-day hike.
2-day Quilotoa Loop itinerary
A 2-day route is best if you have limited time or want less hiking.
Day 1: Isinliví to Chugchilán
Sleep in Chugchilán.
Day 2: Chugchilán to Quilotoa
Finish at the crater lake and return to Latacunga.
To start this version, travel from Latacunga to Isinliví or take transport toward Sigchos and connect from there. Schedules can change, so check locally before leaving.
1-day Quilotoa option
If you do not want a multi-day hike, you can visit Quilotoa Lake as a day trip from Latacunga or Quito.
From Latacunga, take a bus to Quilotoa, see the viewpoint, walk part of the rim, and return the same day. This is much easier than the full loop.
From Quito, a day trip is possible, but it is a long day. You spend several hours on the road and get less time at the lake.
Choose the day trip if you want the view without carrying a backpack or sleeping in small villages.
Should you walk down to Quilotoa Lake?
Walking down to the lake is worth it if you have time and energy.
The way down is steep and dusty. The way back up is much harder because of altitude. Many travelers find the climb back more tiring than expected.
If you arrive late after hiking from Chugchilán, skip the lake descent. The rim viewpoint is already beautiful, and you still need time to catch transport or check into your guesthouse.
Common mistakes to avoid
Starting too late
Do not start hiking near midday. Trail times can be longer than expected, especially if you take wrong turns or stop for photos.
Carrying a large backpack
A big backpack makes the hike harder. Leave extra clothes and gear in Latacunga.
Forgetting cash
There are no ATMs on the route. Bring small bills from Latacunga.
Trusting phone signal
Some accommodation areas have internet, but do not count on signal during the hike. Download maps before you leave.
Underestimating the final day
Chugchilán to Quilotoa is the hardest day for many hikers. Start early and carry enough water.
Skipping sun protection
The sun is strong at altitude. Wear sunscreen, sunglasses, and a hat even if the air feels cold.
Quilotoa Loop budget tips
The Quilotoa Loop can stay cheap if you plan before leaving Latacunga.
Buy snacks in Latacunga, use buses instead of private transfers, sleep in simple guesthouses, and carry a packed lunch. Keep your luggage in Latacunga so you do not need paid transport for your big bag.
The best budget move is to book stays that include dinner and breakfast. This keeps food planning simple and reduces extra spending in small villages.
Best Quilotoa Loop plan for most travelers
For most travelers, this is the best plan:
Day 0: Arrive in Latacunga, sleep there, leave your large bag.
Day 1: Bus to Sigchos, hike to Isinliví.
Day 2: Hike Isinliví to Chugchilán.
Day 3: Hike Chugchilán to Quilotoa, see the lake, bus back to Latacunga.
Day 4: Rest or continue to Quito, Baños, Cotopaxi, or Cuenca. If you are planning more nature-focused trips in South America, this Iguazu Falls Travel Guide is another strong place to add to your route.
This plan gives you the full classic route without adding extra hotel nights in Quilotoa.
Final thoughts
The Quilotoa Loop is one of Ecuador’s best budget hikes because it mixes village stays, Andes views, and a crater lake finish without needing camping gear. The route is simple once you break it into 3 hiking days: Sigchos to Isinliví, Isinliví to Chugchilán, and Chugchilán to Quilotoa.
Plan your cash, download offline maps, start early, and respect the altitude. If you do that, the Quilotoa Loop becomes a clear and realistic trek, even for travelers who have never done a multi-day hike in South America before.


